How to assign a Static IP Address in Apple Mac OS for free
Your end devices need a static IP Address so as to receive incoming traffic through port forwarding
Dynamic IP, Static IP, what??!
The words dynamic and static mean exactly what you think they mean. Dynamic is something that changes frequently, like your hairstyle, and static is something that stays constant, like your name (but can be changed if needed). If your computer has a dynamic IP, its IP address will change every time your computer is rebooted. If it has a static IP, it stays fixed unless manually changed by the user. Below is the step by step process to change
Step-1,Navigate to the network settings screen
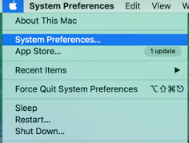
- Access the dropdown menu by clicking the Apple logo on the top left corner of the screen and launch System Preferences.

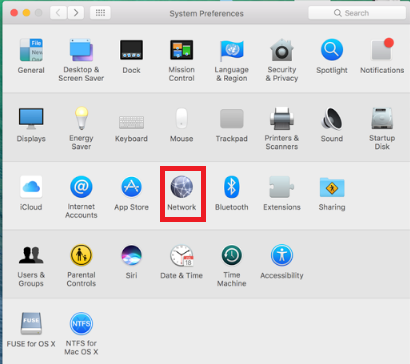
- Once in the System Preferences window (it should look like the screenshot below), we access the computer’s network options by clicking on the Network icon

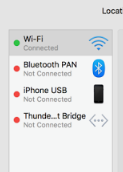
- Click on the network that is currently connected. In my snapshot the Wi-Fi network is connected. Then click on the Advanced / Configure button

Step-2, Assign a static IP Address to your MAC BOOK
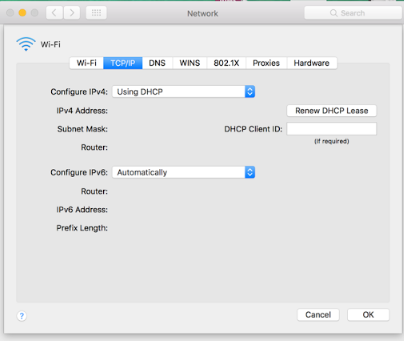
- In the window that opens, select the TCP/IP tab. It should look like this:

- Your Mac is currently set to configure its IP using the DHCP server. In simple words, your Mac is currently set to use dynamic IP’s and every time you reboot, a specific DHCP server assigns it a new IP. Change the Configure IPv4 setting from Using DHCP to Manual. All tabs below the Configure IPv4 setting will now become active (as seen in the snapshot):

- You now have access to set whatever IP you seem fit (as long as it is valid). Manually fill in the required IPv4 address. You can keep it similar to the default value and change only few digits in the last row. For example, if your IP was 193.167.0.5, you can type in 193.167.0.10. Stay within the 10-255 (that is the max value possible) range
- Enter the subnet mask and router IP as it was in default.
- Apply changes and reboot the system. Go back to network settings and make sure the location is still pointing to Static IP and confirm the IP hasn’t changed. you have now successfully set a static IP address for Mac OS X
Cheers!
moIrving
posted onEnjoy great content like this and a lot more !
Signup for a free account to write a post / comment / upvote posts. Its simple and takes less than 5 seconds